Doing it on a budget is a whole lot of slow, tedious work.
I generally know what I want, it's just a matter of finding it, or finding something I can make into 'it'.
I've talked about the finishing items we put into this house that were salvaged items SALVAGE
Furnishing it has also been a matter if hunting and picking and primping.
I have wanted a desk with hutch for my little office corner of my kitchen forever.. in fact it was supposed to be built right in... but then the builder cut our kitchen budget, and I had to start cutting things out... the Butlers Pantry which we finally finished Butler Pantry , the hutch, which I've made do with a variety of 'stand-ins', HUTCHES and this desk.
After seeing several desks with hutches that did not work for various reasons [size, style, price, location] I saw an ad on Craigslist a few weeks ago, and bought this desk. It's not quite what I wanted, but I thought I could make it work. Like many pieces of furniture it's made of wood and cardboard, so I ripped off that cardboard backer and planned to replace it once I had the thing painted. I went with the same black as my chairs CHAIRS
I primed, painted, distressed, and had her ready for the back. I waited a few weeks for hubby to borrow a saw to cut the stuff I had leftover from the china cabinet down to fit, then yesterday I decided I was not going to mess around with what I knew would not work, and went to Home Depot to get plywood that I figured would take wallpaper.
Yesterday, getting that desk back bought and cut to fit at Home Depot was about the only thing that went as planned [WHAT a DAY!], and today I decided to stick with small victories and I wallpapered it.
I had picked up these wallpaper rolls at my local Benjamin Moore store a few weeks ago, out of their closeout/seconds/returns bin. Love that bin by the way... wallpaper is awesome for covering books, covering boxes for storage, and lining drawers or cabinet interiors.

I have no idea what I am doing with this one

This one is probably for lining drawers

These two I plan to use on the armoires I have waiting patiently for my attention in the garage. It was my sisters idea to do each one different, with the paper inside the frame of the door, and then inside the armoire. Thanks Suz!!


And this black one I also wanted to use as the back for the desk hutch
Here's the desk hutch

See how it's basically slabs of wood, a la paneled? It was that dark brown 70's finish originally. I did not take any before pictures, it was too cold in the garage where I do the the sanding!
look at what a mess the dining room/play room/moms work room is!


And here's the back getting papered


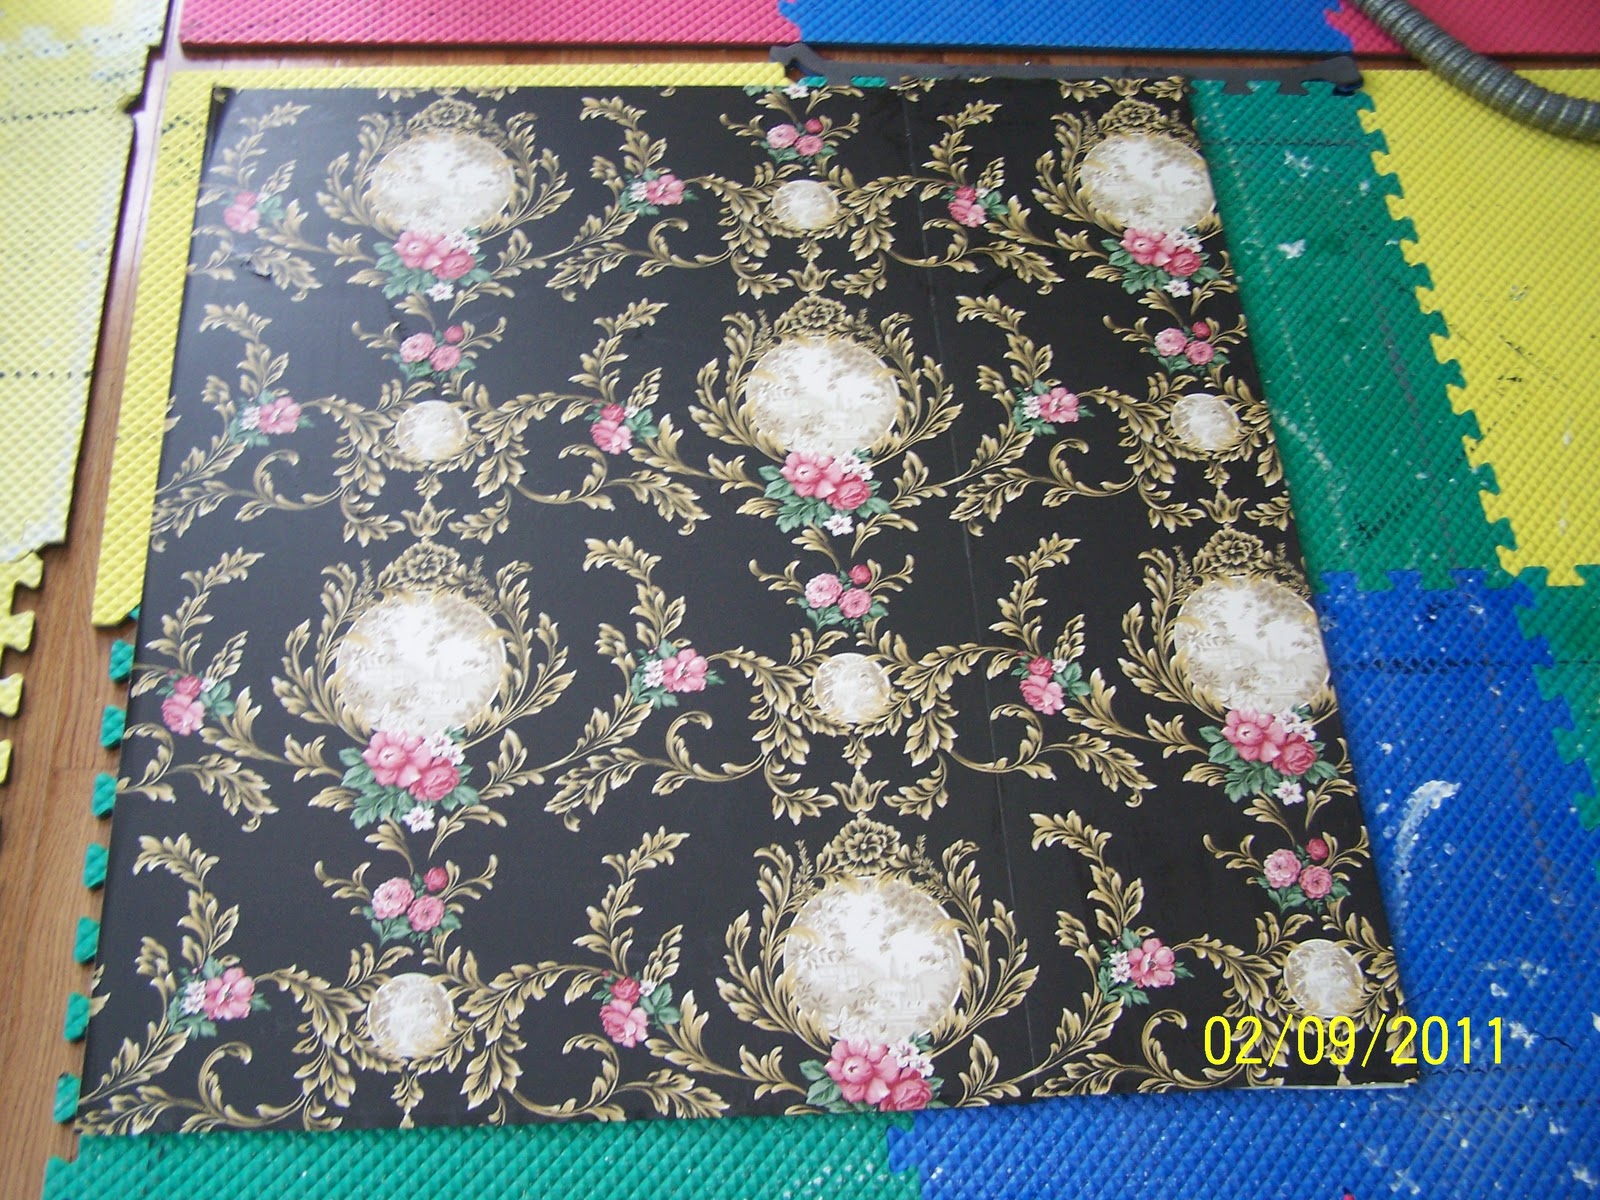
Remember the fiasco that was papering the back of the China cabinet? HERE The trick is to use plywood, which does take wallpaper, and not that pressboard, which does not.
And here it is, with the back leaning up against it cause I just could not wait to see it. I like the mix of the rugged slab wood hutch and the formal, feminine wallpaper.

The final finishing touches will be a bit of crown molding I got to put at the top, and then of course, the desk that goes below it...
YIPPEEE!
The Big Reveal!
Here's the desk in place and partly outfitted


The Big Reveal!
Here's the desk in place and partly outfitted


I did not add the crown molding I had, because obviously it would not fit around the top. I think it looks okay without it. Once she's dressed with baskets, cookbooks and otherwise organized you'll never miss it!
And in the vein of 'nothing is ever done', I need to add a new top to this baby, because of that bohemoth computer that I loathe. There's just no actual desk space to use with that gynormous thing on there. Someday I'll get with the times and get a nice laptop, but that is many many sold items and years down the road.
So what do you think?
No comments:
Post a Comment